Pages

Tuesday, November 25, 2014

Home is Where the Hearth Is ...Almost?

I know it seems I've jumped off of Blog Earth, and thanks to some faithful readers, I haven't so I'll let you in on some stuff we've been up to around here!

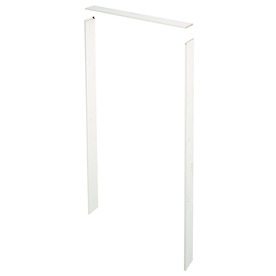
I put up door casings in the kitchen, finally.  The drywall was scuffed, chipped, even chewed in one spot (by a member of the family I won't mention.)  I cheated and used a fancy trim on the top that looks like a header, but this was the easiest option.  I stole this idea from a site and cannot remember where I found it, sorry to the genius that did it first, but hey, at least I'm admitting it wasn't my idea :) More on that later.

We, the spouse and I, decided that we'd love to put a fireplace in the family room.  This project has been on the back burner for 8 years and we now have guts to tackle it! 

Like all good ideas, I perused Pinterest and started a Board of what I like...here,
I Pinned this and wanted to have it similar..


This was just an idea, maybe a little more casual, since it is the family room.

Now, there are a million tutorials on redoing an existing fireplace, not so much when you want a tutorial on how to put in a fireplace.  So I drew a picture.


 Enter the father-in-law, to install the gas insert.  


After that, we decided to pay to have the framing and drywall done, because I'm not feeling brave enough for that and the spouse, well, never mind.  (His idea of DIY is paying someone to DIFY, do it for you!)  That's okay, at least he's man enough to admit that he has no interest in even attempting these projects, he'd rather have it done right.  


Now we have this...


I want it to look like my inspiration photo, sort of, and have a lot of work to do now!
Tile choices and wood trim, but I am getting this done in time for Santa!


Monday, August 25, 2014

Industrial Farmhouse in the 'Burbs


Who doesn't love Fixer Upper on HGTV?
I love Chip and Joanna and secretly covet their profession, but I love, love, love her style. I've always been drawn to that crazy mix of furniture and accents, "whatever you love, you use" type of decor. Now, it's an acceptable style, proving to the spouse that I'm not crazy! 

magnoliahomes.net


magnoliahomes.net

I get that for some strange people, they don't even like her style, but I can't get enough.  Then reality sets in and I realize that I don't live in a renovated farmhouse in Texas, but a suburban cookie-cutter in Jersey.  (It's okay, I've been there and it's hot, like super hot, in August).
I did decide, however, to add a touch of this Industrial Farmhouse Decor to my house.

 I'm calling it Farmindustriaburb-house. 
(Whatever, my kids liked it).

The first order of business was to get rid of the ginormous pub table that ate up half of my kitchen and all of the view of what little bit of a yard we actually do have to see.  


So I busted out the farmhouse table we had in the playroom that was collecting crap, and decided to paint it and distress it.   This table actually has sentimental value, to me anyway-it was our first-ever table that we bought when we got married! Cute right?  

Next, I had to get my hands on some of those metal chairs. Now I like them enough, but not enough to spend $300 on each chair.   I found a perfectly priced set at Overstock.com and lucky for me they came in a four pack.
overstock.com

Last up, I opted for a bench that can seat 3 small butts and be pushed completely under the table to create more space.  I found a frugal but nice bench online.  


I painted the legs of the table black because it goes with what we already have in the kitchen, and then I distressed it with sandpaper on random edges.  (let's face it, with five kids it will be distressed on it's own). 


I did the same to the bench because it had perfect paint on the legs.  

The surfaces of the bench and table are different and I really don't care, because Joanna wouldn't.


Thanks for looking!

Wednesday, July 16, 2014

A Cut Above


I have no attachment to Coco Chanel, but this quote couldn't be more true.  My five year old is living proof.  A few weeks ago, she proceeded to lob off all of her 5 years of curly growth, in 3 snips.   Did I mention her dad's a barber?  Maybe it's in her genes? After an initial (week) of shock, and a lecture about how "we don't use sharp scissors without a grown up," I have come to love her hair and honestly can't remember what she looked like before.  It has changed her appearance drastically, in a good way.  Her eyes look huge and her smile brighter, she just looks so tidy (which, if you've spent any time with a five-year-old girl with long hair, you'll know that's hard to come by. They always look disheveled and dare I say, messy?  hey, it's my blog)  Anyway, we love it.

 But more important, is the way she feels and her reaction to the change.  This kid has a new sense of "freedom"  it seems.  She doesn't care who stares at her, who makes comments positive or negative, she loves the new her.  I'm loving the new her!  The first day after the cut, I saw her walk by a mirror and give herself a little smirk, as if saying to herself "You Rock."  It was not only the cutest thing to witness, but the moment I realized this little person has her own confident personality and and I am proud of it.  She  understands that you don't need hair, or anything else, to make you beautiful, it's inside and let me tell you, boy is it ever shining out of her! 

My daughter has started a little trend and two of her friends have begged their mothers for the same cut...so far one gave in.  

So I'm loving these moments, I know these are going to be stories we share one day with a strong, truly beautiful woman that we will have raised!  

She really has changed her life, with one hair cut.


Wednesday, July 2, 2014

Custom Window Panels for Cheap


I've been going back and forth with changing out my color scheme in the living and dining rooms, but since I am blooming where I'm planted and everything, I should make the most of what I have right? 
I found these lovelies at The Country Door for less than $20 each.  They are sheer and look like a linen panel, but most importantly, they carry the colors of the living room into the dining room (the pic looks red, but they are that rust orange- which is hard to find in "Summer" textiles). 

 Sounds great right? But they were too short.  I love 9 ft ceilings but it's hard to find 120" length drapes that I want.


 I decided to take a chance and order an extra panel to sew onto the bottom of the shorties.  I planned to use some type of trim at the seam to conceal where they are connected. But once I finished sewing and hung them, it's hard to tell where the seam even is, so I left them.  
My technique?  I hung the too short panels on the existing rod and measured from the bottom of the panel to the floor. I then sewed the length needed onto each panel.  This way they are exactly the right length.  (I won't divulge how many times I have re-hung a rod because I wasn't happy with where the panel fell once it was hung!) 


Easy and for only $30 !

Wednesday, June 11, 2014

Rockin' a Door Jamb


I put some finishing touches on the hallway treatment, so technically this is part 3 I think?  When I originally completed the hallway, I made the mistake of putting up the wood trim without there being any door trim around the entrance of the kitchen. 


It always bothered me, so I tore out that section and added a door jamb and trim then put back the wood to recreate the paneled look.  It was a bit of work but it made such a difference. (Still needs a good sanding and second coat of paint though..)


Adding a door jamb is simple and for our family, absolutely necessary!  The door jambs (or lack of) in this house were drywall.  I was constantly patching, sanding, and repainting them.  The puppy even bit one at one point.  I used the door jamb kit at Lowes' since this was a standard doorway it worked perfectly.  I chose to trim the doorway with the same trim that exists around the powder room and basement doors, keeping it simple here.
Lowe's

I added an extra vertical board in one spot and the shoe molding...and why quit there?  I extended the paneling down the hall, around the turn, and toward the stairs.  Again, this area just looked unfinished.


Now I need to finish sanding and painting!!


As for the other two openings in my kitchen, they are 4 feet wide and 8 feet high.  I have plans for them, but want something more dramatic than the regular 2 .25" trim that the builder used on the other doorways.  I'll get to it. 

Wednesday, April 30, 2014

3 Minute Topiary Tree

Remember my cute topiary from last Summer?  I killed it in a week I think.  It went bald then never sprouted one new leaf.  :(  

I liked her, but wasted 15 bucks on her and she died. So when I spotted these cute, (fake) boxwood spheres, for less than $4.00 a piece, I knew I wanted to make topiaries out of them.  


I just used a two pieces of natural sticks.  Thanks to my son for jumping out of the car for a huge branch I spotted on the side of the road.  I measured how tall I wanted the stalks to be and cut the branches to size.


I hot glued the spheres onto the sticks


I used clay pots with floral foam inside and just jabbed the branches in, then covered the foam with some Spanish Moss I had on hand.  


(Much better than the one from last year.)

Friday, March 14, 2014

Burlap Spring Banner

I am so ready for Spring,  it's still cold here, but I decided it's time to decorate anyway.  I made an easy Spring Banner out of scrapbook paper, which actually looks like burlap.  


Since real burlap frays so bad when it's cut (and I had this paper on hand),  I decided to try to make an easy imitation of those cute burlap banners that are all over now.  I printed the letters on cardstock, cut them out, and glued them on.  (You could simply print it directly onto the paper if you want to try to line it up.)  


Looks like burlap, right?


Happy Spring!


Friday, March 7, 2014

Pillow Talk

I'm sharing my "rule of thumb" that I always follow when putting patterns together. I prefer a neutral base (walls or furniture) that you can add color to. I change-up my throw pillows all the time, usually with the of seasons. This is my no-fail, inexpensive way to get a new look.

I can appreciate a sofa full of colorful printed pillows, but on a limited budget, the attempt can sometimes go wrong.  I believe, (just my opinion now) that if you're on a budget and really don't know where to start, you need to abide by these few rules:)


1. Use one print per "category."  

Let me explain. I like to organize fabrics into three categories and choose one from each to decorate with:

floral
geometric
solid color texture

Here's an example:

My family room sofa is neutral. Poop brown really.  To add some flair, it has pillows in an Ikat print (floral category), Zebra Chenille (geometric), and solid Cable Knit (texture.)


Again, I followed my "rule" in the living room, where I have a Suzani Print (my floral), a chevron (geometric), and a fluffy thing (texture) layered over a neutral (Greek Key.)


2. Display only an odd number of pillows.
  
Three or Five, never two or four.  
Odd numbers are more appealing to the eye. I heard somewhere to use this rule on everything from landscaping to cake decorating, and in our case- children!
(3 shrubs, not 2, in the flower bed, five roses on the cake , not 4...get it?) Once you start to notice, it really does make a difference.


3. Above all, the pillows should be comfortable. 
  
People should actually want to sit with the pillow, not move it to be comfortable. 
Your kids, spouse, or (in our case) pets should be able to actually use the pillows. 


Try pillows made with down feathers if you haven't before, they make furniture more inviting, and softer. 

fabric.com 

I won't waste money on super expensive pillows, only to turn around and cringe when everyone is throwing them around!  Let's face it, with five kids and this dog, they get used a lot. I've sewn many of them myself, so that I can change them up easily or say "oh well"  when the dog ruins them and the kids spill!  

 Sturdy fabric with well-sewn seems and down inserts keeps them comfy while taking a beating!

Thanks for looking!

Wednesday, February 19, 2014

I will, you should too...


Sunday, February 9, 2014

Control Freak


Sometimes you just have to give in and realize, you have no control over anything.  I need to wear one of these bad boys... 

 I will be the first to admit, I pretty much run the household and coordinate everything that takes place here. I plan and execute, solo. All was well, until a kidney stone stopped me in my tracks. I was forced to give up everything for an entire 3 days.  Now, I have never, ever, been so incapacitated in my life.  (I was the lady who tried to leave the hospital 24 hours after delivering my kids.) 


 So this was not only physically painful, but mentally too...we were set to leave for Disney in 3 days. Oh and I hadn't packed one darn bag for anyone... nothing, because I always wait until the last minute.  Somehow, I threw it all together and somehow, we made it there, kidney stone included, but no pain (an answer to prayers). 


Disney itself could be a whole different post. Let's just say that I am not, by any means, a "Mickey-kind-of-Girl."  Whatever,... make your faces, talk about me, I'm not. Neither is the spouse. We only went for the kids. I hate crowds, lines, greasy food, and time schedules.  There's nothing relaxing about this trip. Add in a dash of kidney stones, and this is not looking good.

But I have learned some valuable lessons about letting stuff slide, giving up control, and being thankful for being healthy. I was O.K. when my "good camera" hit the pavement in Hollywood Studios: Day 2 (and is now a goner), or when my son "misplaced" his new ipod in the villa and it was mysteriously swallowed up and never found, or when I forgot the not-so-great (backup)camera at our  Princess Dinner, and who cares that it rained half of the trip.  I decided to forgo "perfect" for this vacation and focus on having fun and spending some much needed time with my husband and kids, all together. 


So, I may have envisioned our trip to appear a little like this... 


Google Image

when it looked more like this...


Crappy i phone pic
I'm alright with that, because we had a great time and we are healthy, how often that's taken for granted!

Wednesday, January 8, 2014

Wo-cave?


Happy New year!  
I'm still in the process of taking down the Christmas decorations, which is bittersweet, it went by too fast. I usually get inspired to move furniture, organize, repaint, or tear down walls this time of year.  (Wish I could)  

I decided to start small.  Call me selfish, needy, self-indulgent, even territorial.  I don't care.  I'm claiming a little space in this house as my own.  I won't say it's "off-limits" to kids, but it's limited, as in, they can hang up their backpacks in there.  I moved all of their video game crap to the "playroom"  that we've never used, in the basement.  I'm getting ready to finally set up that Command Center I promised myself I'd do.  I put together a mental image of what I want, within reason, of course.  This is one spot where I don't even need to consider what anyone else wants or likes.  None of that, "Well, it's too girly, there's too many boys in the house for that rug/paint/furniture, etc..."

So I've challenged myself to see if I can bring this together for really cheap. 


I'm using keeping the bamboo desk and she is getting a makeover in red, inspired by her cousin piece below...


So far, so good, I snagged this rug for 70% off at rugsusa.com 


I've always wanted a reason for an acrylic chair to exist in my life...


and here she is, found at Amazon, for just over $100. 
 (but for some reason I'm having this recurring vision of someone tilting back in it and the legs cracking off like a cheap outdoor stack-able...I'll let you know, it's still "in transit" so we'll see.)

I bought a couple of funky pillows, (I'll surprise you later) and I have a need  for these beauties in here too.  They are not in the budget, so I have to do these myself somehow.


crate and barrel
As for my paint color, I'm guessing gray but I also want to carry through the molding from the landing zone, on the lower portion of the walls.

Stick with me... this should be interesti
ng!